

A static IP handle is a hard and fast, unchanging numerical label assigned to a tool or server on a community. In contrast to dynamic addresses, a static IP stays the identical every time the machine connects to the web or a neighborhood community. This kind of handle is often used for providers that should at all times be accessible at a identified handle, resembling internet servers, electronic mail servers, or distant entry setups.
In distinction, a dynamic IP handle is quickly assigned and may change periodically. These addresses are usually issued by Web Service Suppliers (ISPs) utilizing the Dynamic Host Configuration Protocol (DHCP). Dynamic IPs are extra appropriate for on a regular basis customers who don’t want a everlasting handle, and for whom frequent adjustments received’t disrupt common web utilization.
Foremost Variations Between Static and Dynamic IP Addresses
- Consistency: Static IP addresses stay the identical, whereas dynamic ones change over time.
- Software: Static IPs are most well-liked for business-related providers, internet hosting, and server use. Dynamic IPs are usually enough for residential and informal use.
- Configuration: Static IPs have to be arrange manually, whereas dynamic IPs are robotically assigned and managed by the supplier.
- Community Administration: Managing static addresses requires extra effort and handbook enter, whereas dynamic addresses are managed by way of automated DHCP programs.
Frequent Makes use of of Static IP Addresses
Servers and On-line Internet hosting
A static IP makes it simpler for customers and programs to persistently find and entry your server, bettering reliability for web sites and hosted providers.
Distant Entry Configuration
When connecting to gadgets remotely (resembling by a VPN), a static IP ensures steady entry by offering a constant level of connection.
Internet hosting Recreation Servers
Utilizing a static IP simplifies internet hosting and connecting to sport servers, serving to to take care of steady connections for a number of customers.
Managing Community Assets
Some networking {hardware} and monitoring instruments depend on fastened IP addresses for environment friendly entry, monitoring, and configuration.
Advantages of Utilizing a Static IP Deal with
- Dependable Connectivity
A constant IP ensures uninterrupted entry to providers that require fixed availability. - Simplified Service Configuration
Functions and providers are simpler to arrange and preserve when the IP handle doesn’t change. - Safety Enhancements
Fastened IPs can be utilized to configure firewall guidelines, entry restrictions, or allowlists, bettering management over entry. - Improved DNS Help
Internet hosting a DNS server or self-hosted area providers is extra reliable with a static IP.
Potential Drawbacks of a Static IP Deal with
- Further Price
ISPs usually cost additional for static IP addresses, as they require handbook allocation and administration. - Privateness Considerations
For the reason that handle doesn’t change, it turns into simpler to hint a consumer’s exercise over time. - Advanced Setup and Upkeep
Static IP configurations usually require handbook setup, and resolving IP conflicts or errors might have superior information. - Elevated Publicity
As a result of static IPs stay fastened, they will change into simpler targets for assaults if not correctly secured.
Methods to Get hold of a Static IP Deal with
Step 1: Contact Your ISP
Most Web Service Suppliers supply the choice to buy a static IP handle. It might come as a part of a enterprise bundle or as an add-on service.
Step 2: Request Particulars
Ask the supplier about pricing, availability, and what number of static IPs they will assign to your account.
Step 3: Configure Your Gear
When you obtain your static IP settings, you will have to manually enter them into your router or machine configuration panel.
Frequent Parameters to Enter:
- Static IP handle
- Subnet masks
- Default gateway
- Main and secondary DNS servers
This configuration is normally carried out by the net interface of your router or modem.
Setting a Static IP Deal with in Home windows
Guide Configuration Via Community Settings
- Open the Community Settings
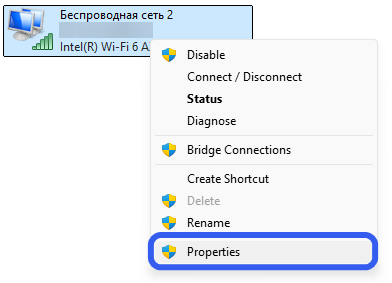
Press Win + R, sort ncpa.cpl, and click on OK. - Select Your Community Adapter
Proper-click the community adapter you’re utilizing and choose Properties. - Edit TCP/IP Settings
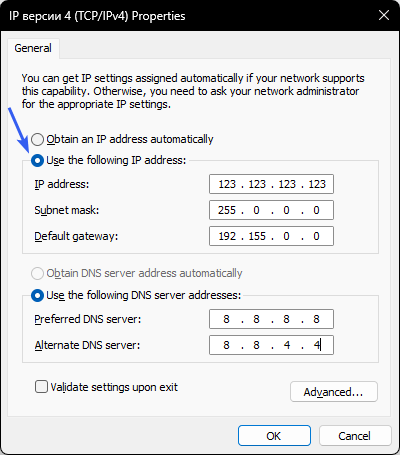
From the listing, choose Web Protocol Model 4 (TCP/IPv4) and click on Properties. - Set the IP Manually
Select Use the next IP handle, then enter:- Your assigned IP handle
- Subnet masks (usually 255.255.255.0)
- Default gateway (usually your router’s IP)
- Outline DNS Servers
Choose Use the next DNS server addresses, and enter:- Most well-liked DNS server: 8.8.8.8
- Alternate DNS server: 8.8.4.4
- Save Your Settings
Click on OK to use all adjustments. Your static IP is now energetic.

Configuring a Static IP by way of Command Immediate
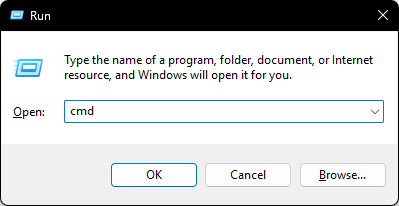
1.Open Command Immediate
Press Win + R, sort cmd, and click on OK.
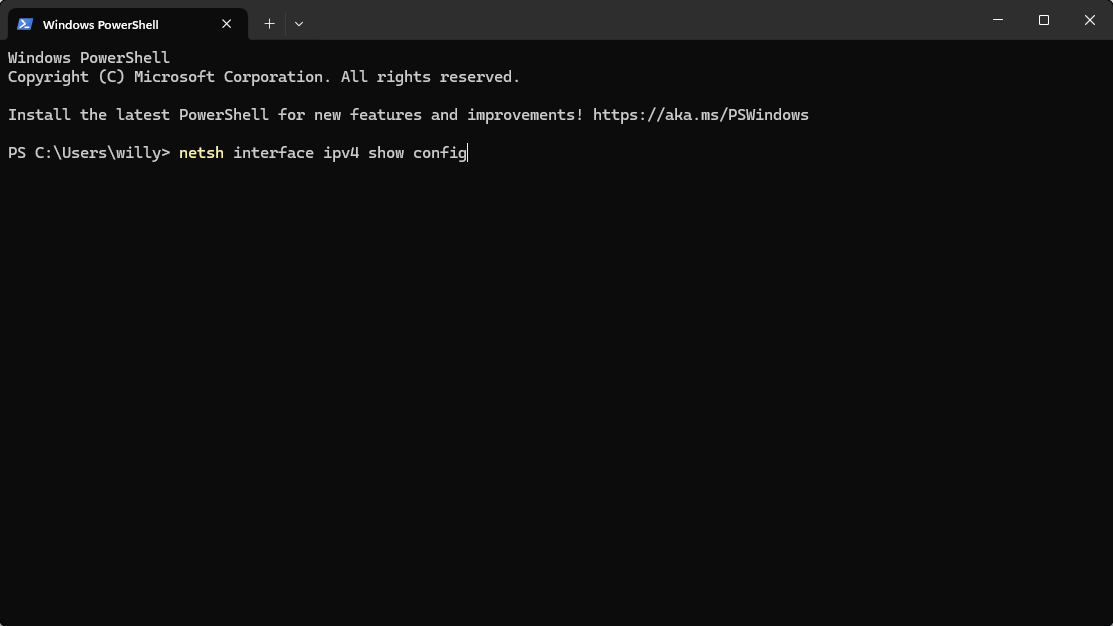
2. Discover the Interface Title
Use the next command to listing your community connections:
netsh interface ipv4 present config
3. Assign the Static IP
Exchange the values along with your community identify and IP settings:
netsh interface ipv4 set handle identify=”NetworkName” static 123.123.123.123 255.255.255.0 192.168.0.1
- NetworkName — identify of your adapter (e.g., “Wi-Fi” or “Ethernet”)
- 123.123.123.123 — desired IP handle
- 255.255.255.0 — subnet masks
- 192.168.0.1 — default gateway
Set DNS Servers
Execute the next instructions to outline DNS:
pgsql
КопироватьРедактировать
netsh interface ipv4 set dns identify=”NetworkName” static 8.8.8.8
netsh interface ipv4 add dns identify=”NetworkName” 8.8.4.4 index=2
Your static IP is now configured by the command line interface.
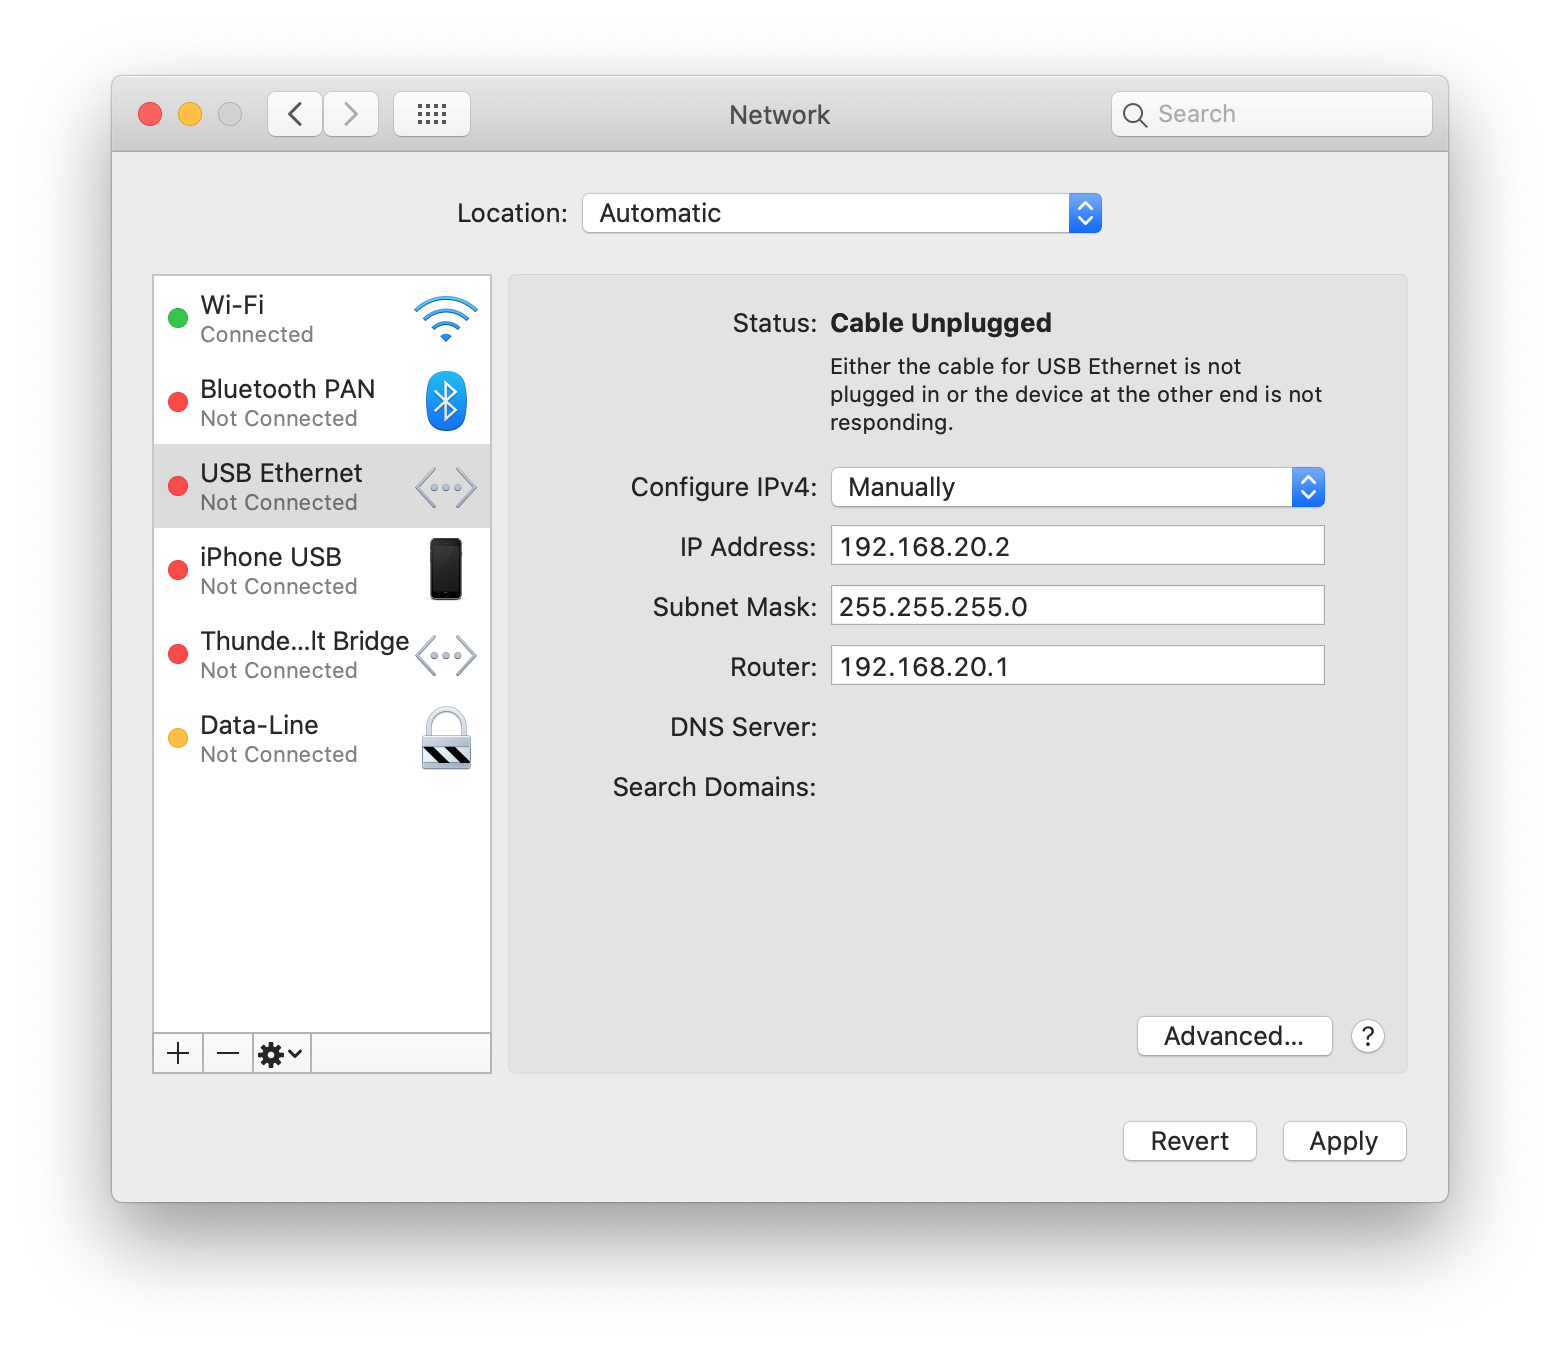
Setting a Static IP Deal with on macOS
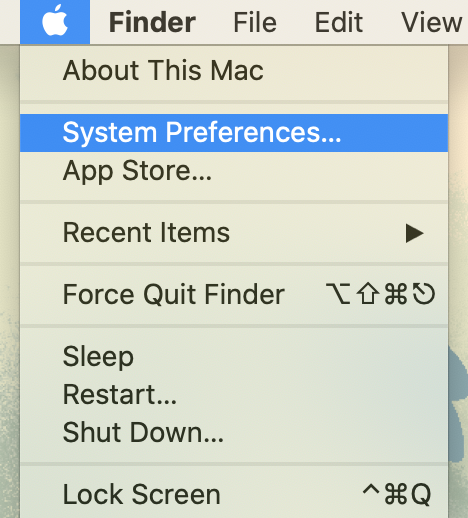
- Open System Preferences
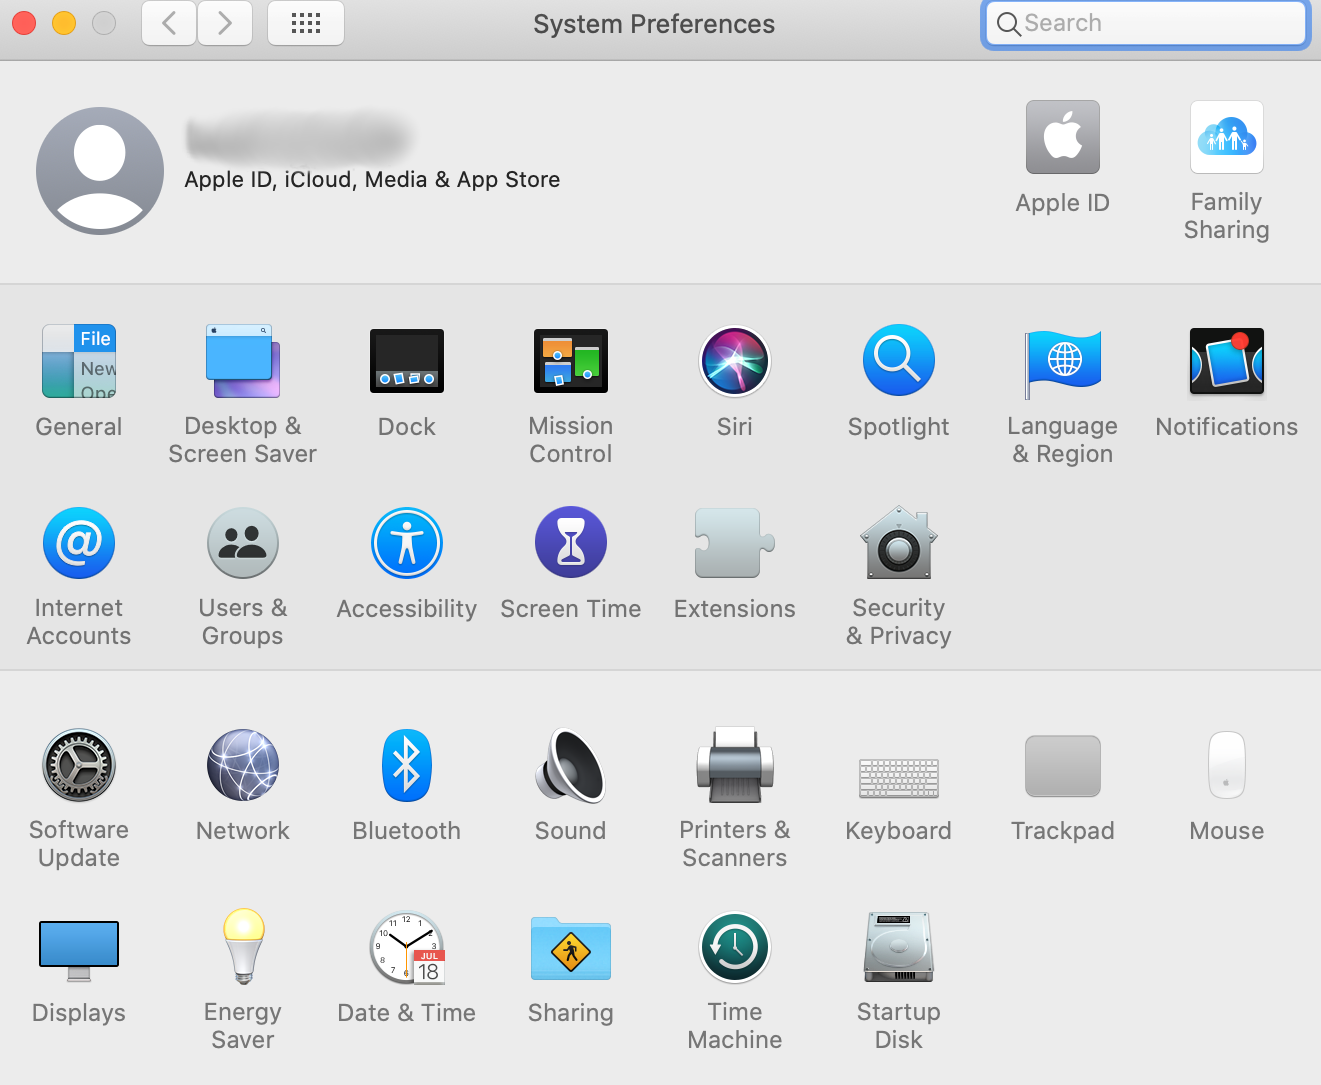
Click on the Apple menu and choose System Preferences. - Entry Community Settings
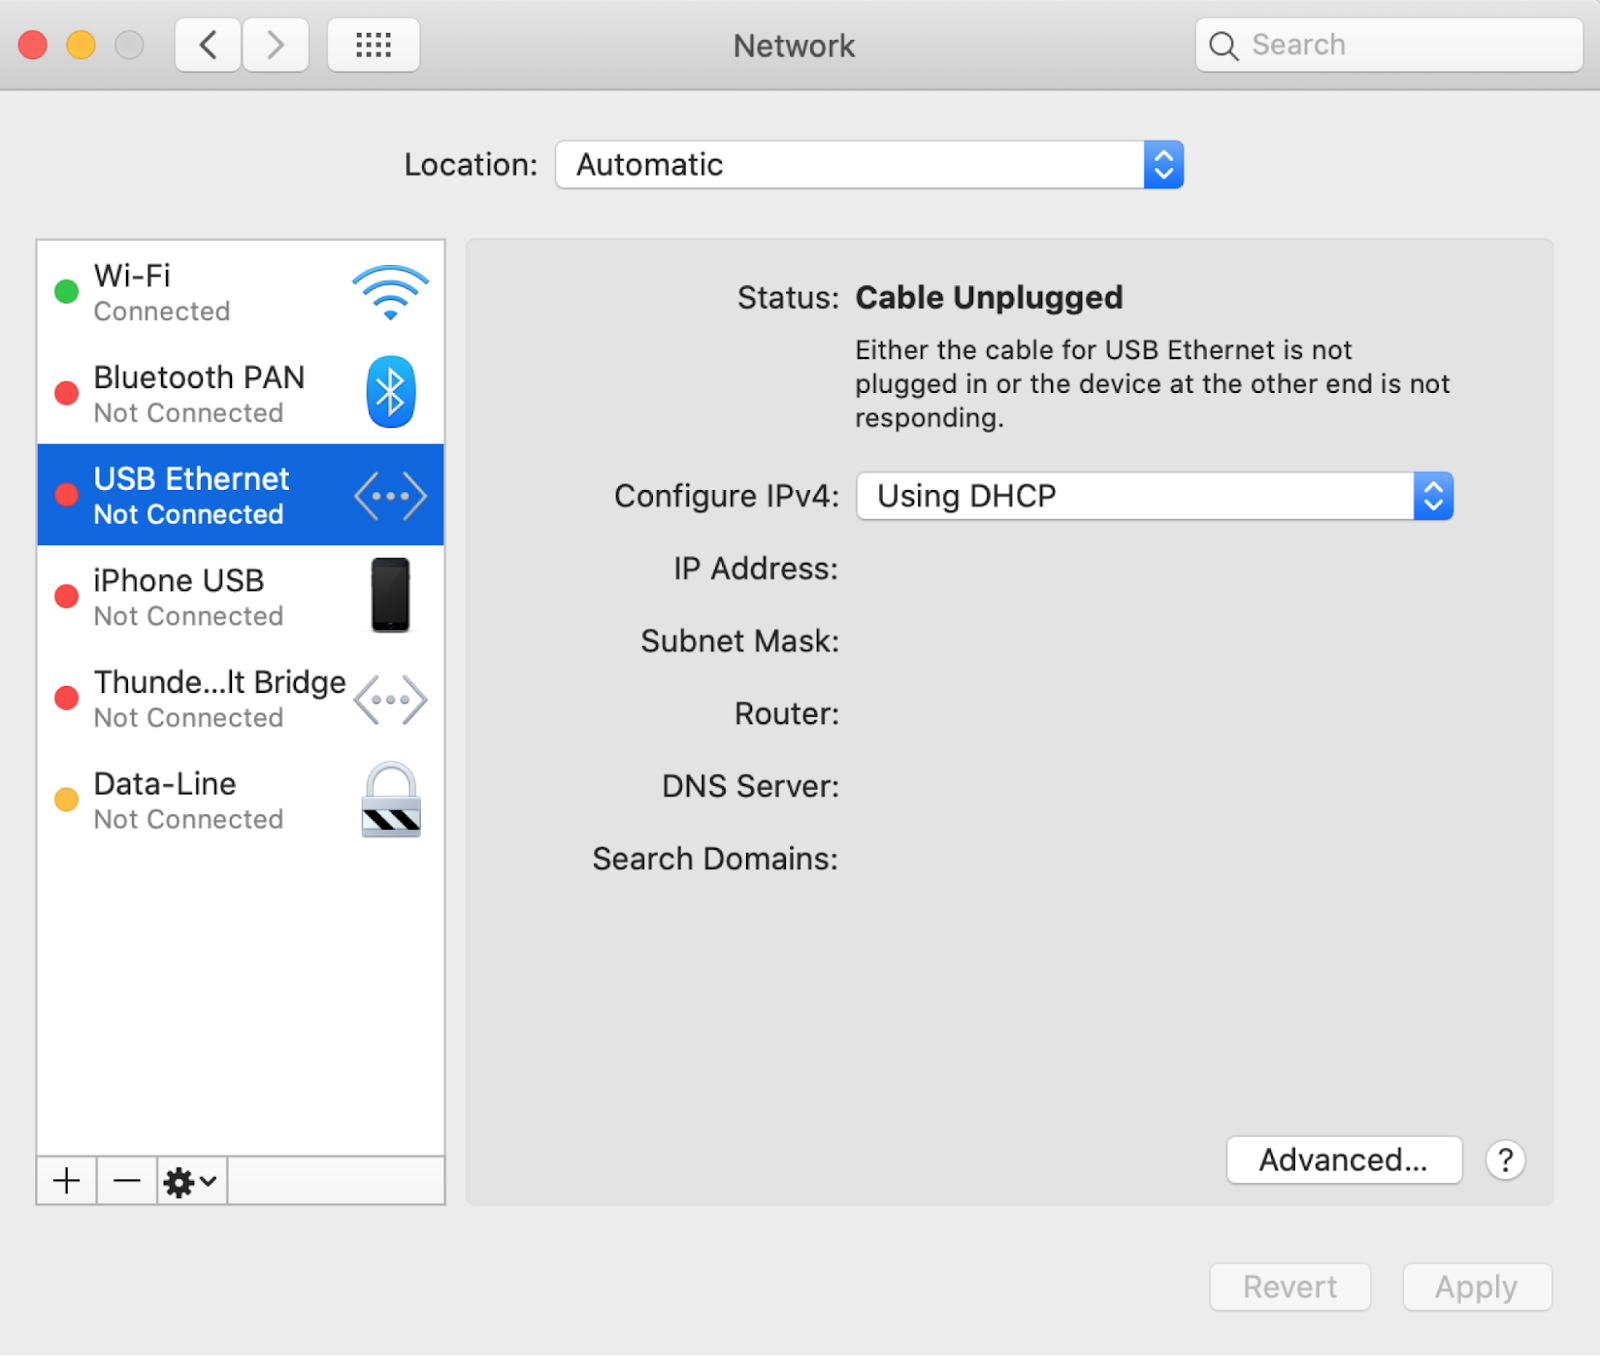
Click on on Community to open the community configuration panel. - Choose the Energetic Connection
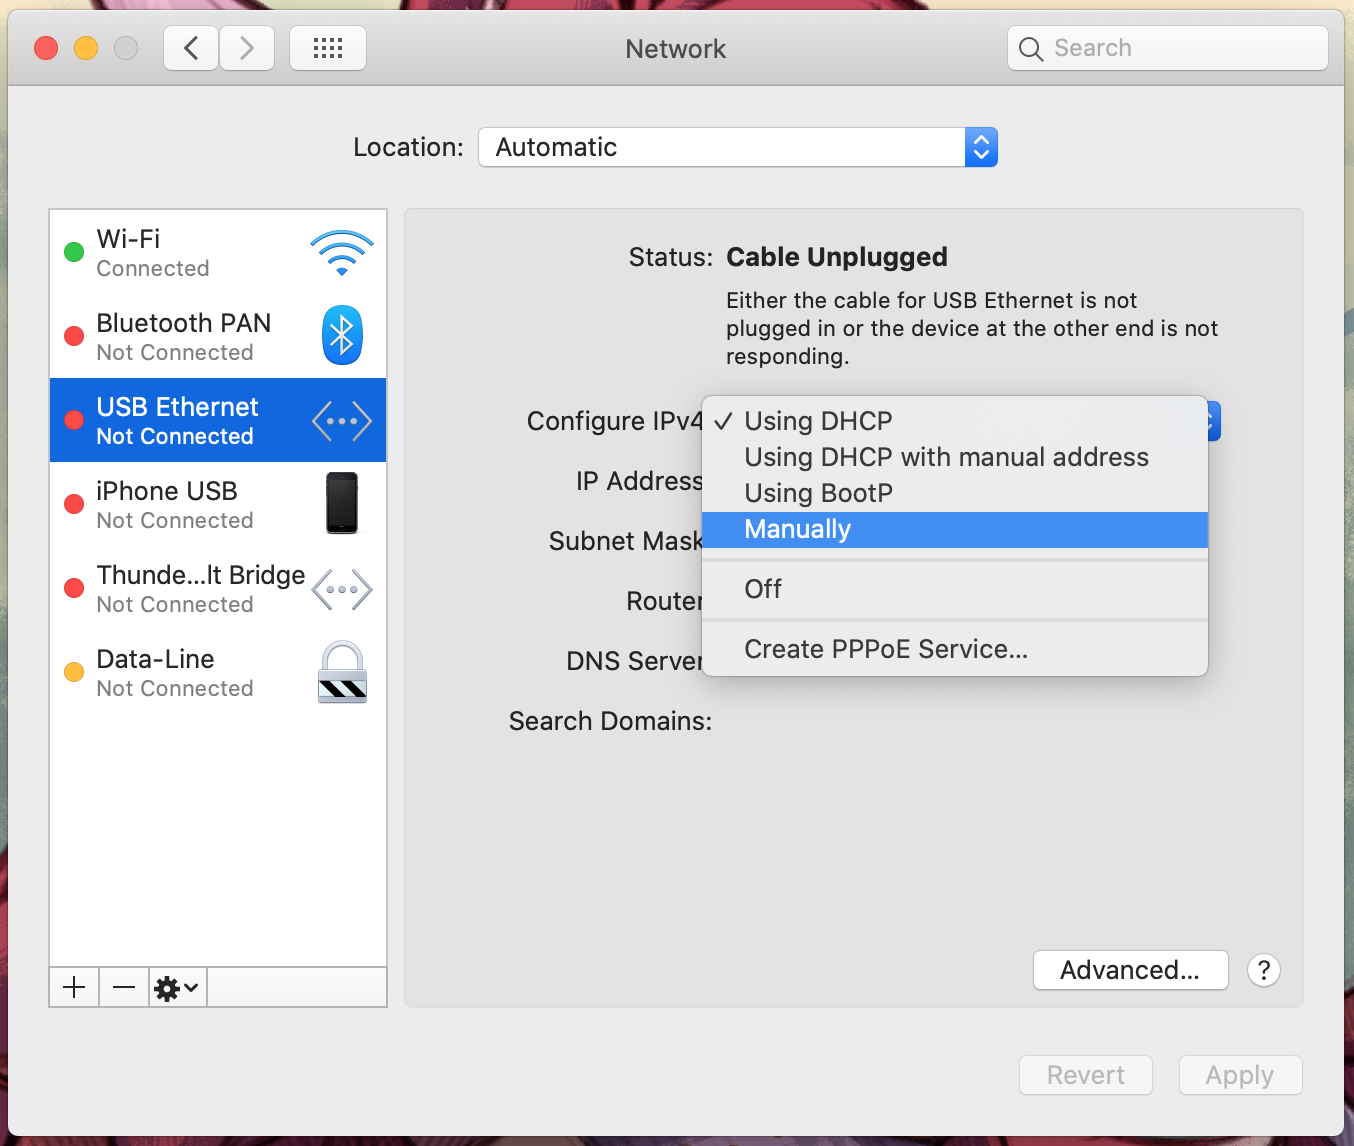
From the listing of accessible connections, select the one you wish to configure. - Manually Configure the IP Deal with
Beneath Configure IPv4, select Manually, then enter:- Your static IP handle
- Subnet masks
- Default gateway
- Click on Apply to save lots of.
- Add DNS Servers
Click on Superior, swap to the DNS tab, and enter: - Save and Exit
Affirm adjustments by clicking OK and shut the settings panel. The static IP is now utilized.

Supply: https://belurk.com/en